
The short answer
DTF transfers can crack or peel, but early failure is a reason to check the transfer, garment, and application process.
A properly produced and applied transfer should stay flexible and bonded during normal wear. Start with when the problem appeared: during peeling, after the first wash, or after extended use.
What is the difference between cracking and peeling?
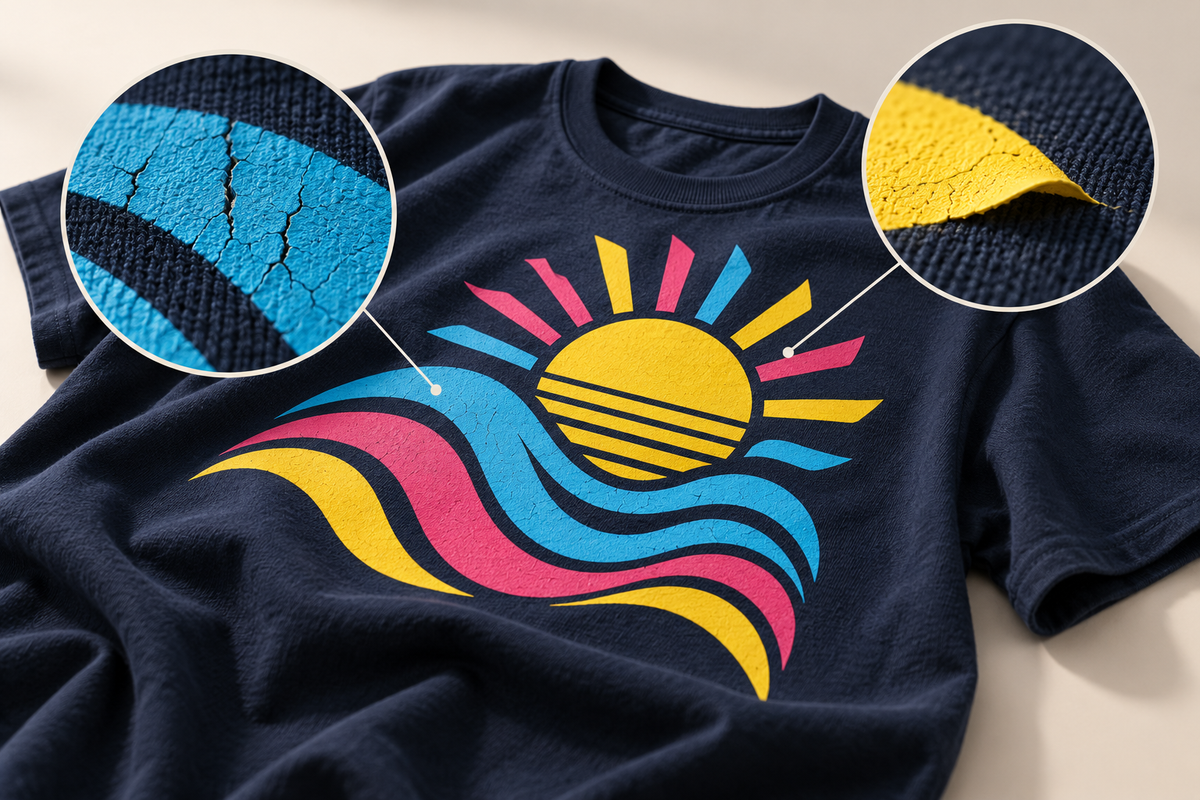
Cracking means the printed layer develops splits. Peeling means part of the design lifts away from the fabric, often at the edges. A shirt can have one problem without the other, and neither symptom identifies a single cause by itself.
Potential contributors include inconsistent ink or adhesive, curing problems during transfer production, incorrect pressing, unsuitable garment surfaces, and later wear or care. Do not assume every failure is the customer's fault or that every failure proves the transfer was defective.
If you buy ready-to-press transfers, production curing is handled by the supplier. Your starting point is the supplied application process and a compatible garment, not an improvised attempt to cure the transfer again.
Start with when the problem appears
| What you notice | What to check | What to do next |
|---|---|---|
| Design lifts with the carrier film | Peel timing, actual platen temperature, pressure, and contact across the design. | Stop pulling the film. Compare your process with the exact transfer instructions before proceeding. |
| One corner or area will not bond | Seams, collars, buttons, moisture, or uneven platen contact. | Correct the setup and test on a spare garment before continuing the run. |
| Edges lift after the first few washes | Application records, garment compatibility, detergent, and drying heat. | Photograph the failure and compare it with a sample pressed and washed under known conditions. |
| Print cracks when stretched | How far the fabric was stretched, transfer flexibility, pressing, and prior wear. | Evaluate normal-use movement on a cooled test garment; avoid pulling it to its limit. |
| Print deteriorates after extended use | Laundry conditions, abrasion, and overall garment wear. | Review care habits and distinguish gradual wear from an early application failure. |
These are starting points, not a diagnosis. If the same problem affects several transfers after the supplied directions were followed, keep a sample and contact Xpress before risking more garments.
Build a consistent pressing process
Check heat, time, and pressure together
A reliable heat press needs even heat and contact across the design. A display setting alone does not prove that the platen is accurate or that the pressure is even. Raised seams and thick garment areas can prevent part of a transfer from receiving the same contact as the rest.
Use the current instructions for your Xpress transfers. Do not borrow another supplier's settings or keep increasing temperature and time to chase an unexplained problem. Our DTF pressing guide covers the application sequence in more detail.
Prepare the garment
Pre-press as directed to flatten the application area and help remove moisture. This is especially useful for damp garments or stock stored in humid conditions. Check that the fabric can tolerate the required heat before pressing an order.
Follow the correct peel method
Xpress DTF transfers use a hot-peel process. The current Xpress guide also gives a cold-peel instruction for transfers stored for one month or longer. Follow the directions supplied with your order, and ask Xpress if storage or product instructions are unclear.
Peel timing is product-specific; other suppliers may use different films. If the design starts lifting with the carrier, stop instead of forcing it away.
Finish with the recommended repress
Complete the finishing press specified by Xpress, using the recommended protective sheet. The guide calls for a repress under Teflon or parchment after removing the film. A finishing press is part of the application sequence; it is not a guaranteed repair for an already damaged or repeatedly peeling print.
Should DTF crack when stretched?
A suitable DTF transfer should move with its garment during ordinary wear. That does not mean every print can tolerate unlimited stretching or every high-stretch fabric is a good match. Large solid designs and very stretchy garments need testing in their intended use.
After application, let the garment cool before assessing it. Check normal movement rather than pulling the shirt as far as it will go.
Protect the print during washing
- Wash inside out in cool water with mild detergent.
- Avoid bleach and fabric softener.
- Hang dry or use low tumble heat where the garment label allows it.
- Do not iron directly on the design.
For expected service life, see How Long Do DTF Transfers Last? Keep the care instructions with every finished apparel order.
How to check transfer quality before a large run
Look for clean edges, consistent color, and sharp detail, then verify adhesion and flexibility on an applied sample. Visual quality alone does not prove wash durability. Press and wash representative garments, keep notes, and repeat the check when the blank or transfer changes.
A low price does not automatically mean poor materials. What matters is consistent results, clear instructions, and support when something goes wrong. Our high-quality DTF checklist explains what to evaluate.
For clothing brands, those checks protect the product customers associate with your name. For print shops, they help reduce wasted blanks, reprints, shipping costs, and lost production time. Xpress focuses on clean detail, vibrant color, and dependable adhesion to support that repeatable process.
What to send Xpress if a print keeps failing
Pause the run and contact Xpress with your order number, garment material, transfer storage history, press temperature, time, pressure setting, and peel method. Include clear photos and explain whether the issue began during application or after washing, plus the care routine used.
Those details help narrow the cause. Repeatedly reheating a failing print without identifying the problem can damage the garment and make troubleshooting harder.
Order transfers for your next job
Choose the format that fits your workflow, then follow the supplied directions for your transfer and garment.


